 Share
Share


Remove the cartridge from the console.
Use a Phillips #00 Screwdriver to remove the screw securing the battery door to the rear case, turning the screw counter-clockwise.
Remove the battery door.

Use a plastic opening tool or spudger to pry out the battery from the bottom. If a plastic open tool or spudger isn't available, your fingernails may work.

Remove the battery from the Nintendo DS.

Remove the 7 Y0 screws located on the back.
It might be helpful to remove the strap from the hole to access the top left screw.


With your hands, pry the back panel off the main case.
Separate the back from the front, and set it aside.

Using a Phillips #00 screwdriver, remove the 4 screws on the circuit board.
Be careful NOT to slip with the screwdriver, you can damage the circuit board!


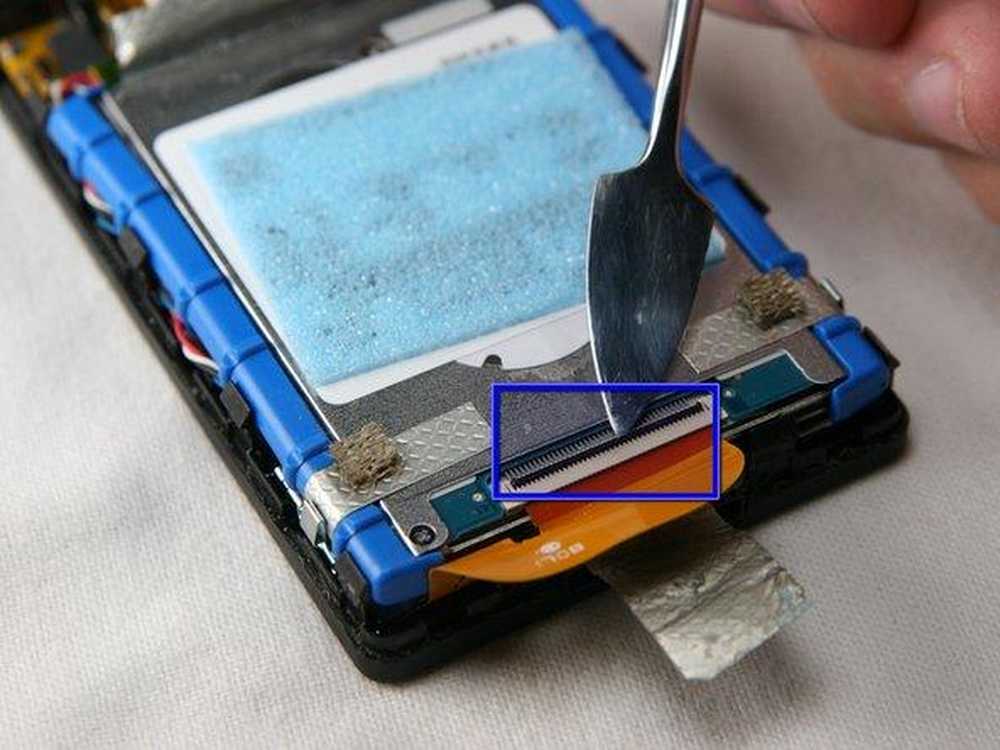
Unlock the two large ribbon cables by moving the black clip up.
Carefully pull the ribbon cables down and out with your fingers.
Do not use pliers to pull the cables, as they can be damaged easily.

Locate the two small ribbon cables, beneath the rightmost large ribbon cable.
Slide the locks for the small ribbon cables down to the side, and remove the cables.
It may be useful to use tweezers to remove the small ribbon cables.
Be careful not to damage the delicate ribbon cables.


Locate the Wifi antenna pigtail connector
Remove the antenna by grasping it at the head with tweezers. Using a slight rocking motion, pull up to dislodge the connector.

Feed the ribbon cables through the opening on the board.
Pull up and remove the circuit board, and set it aside.


Peel off the back foam on the bottom touch screen to expose the ribbon cable.
Gently lift the screen out of the base.
